
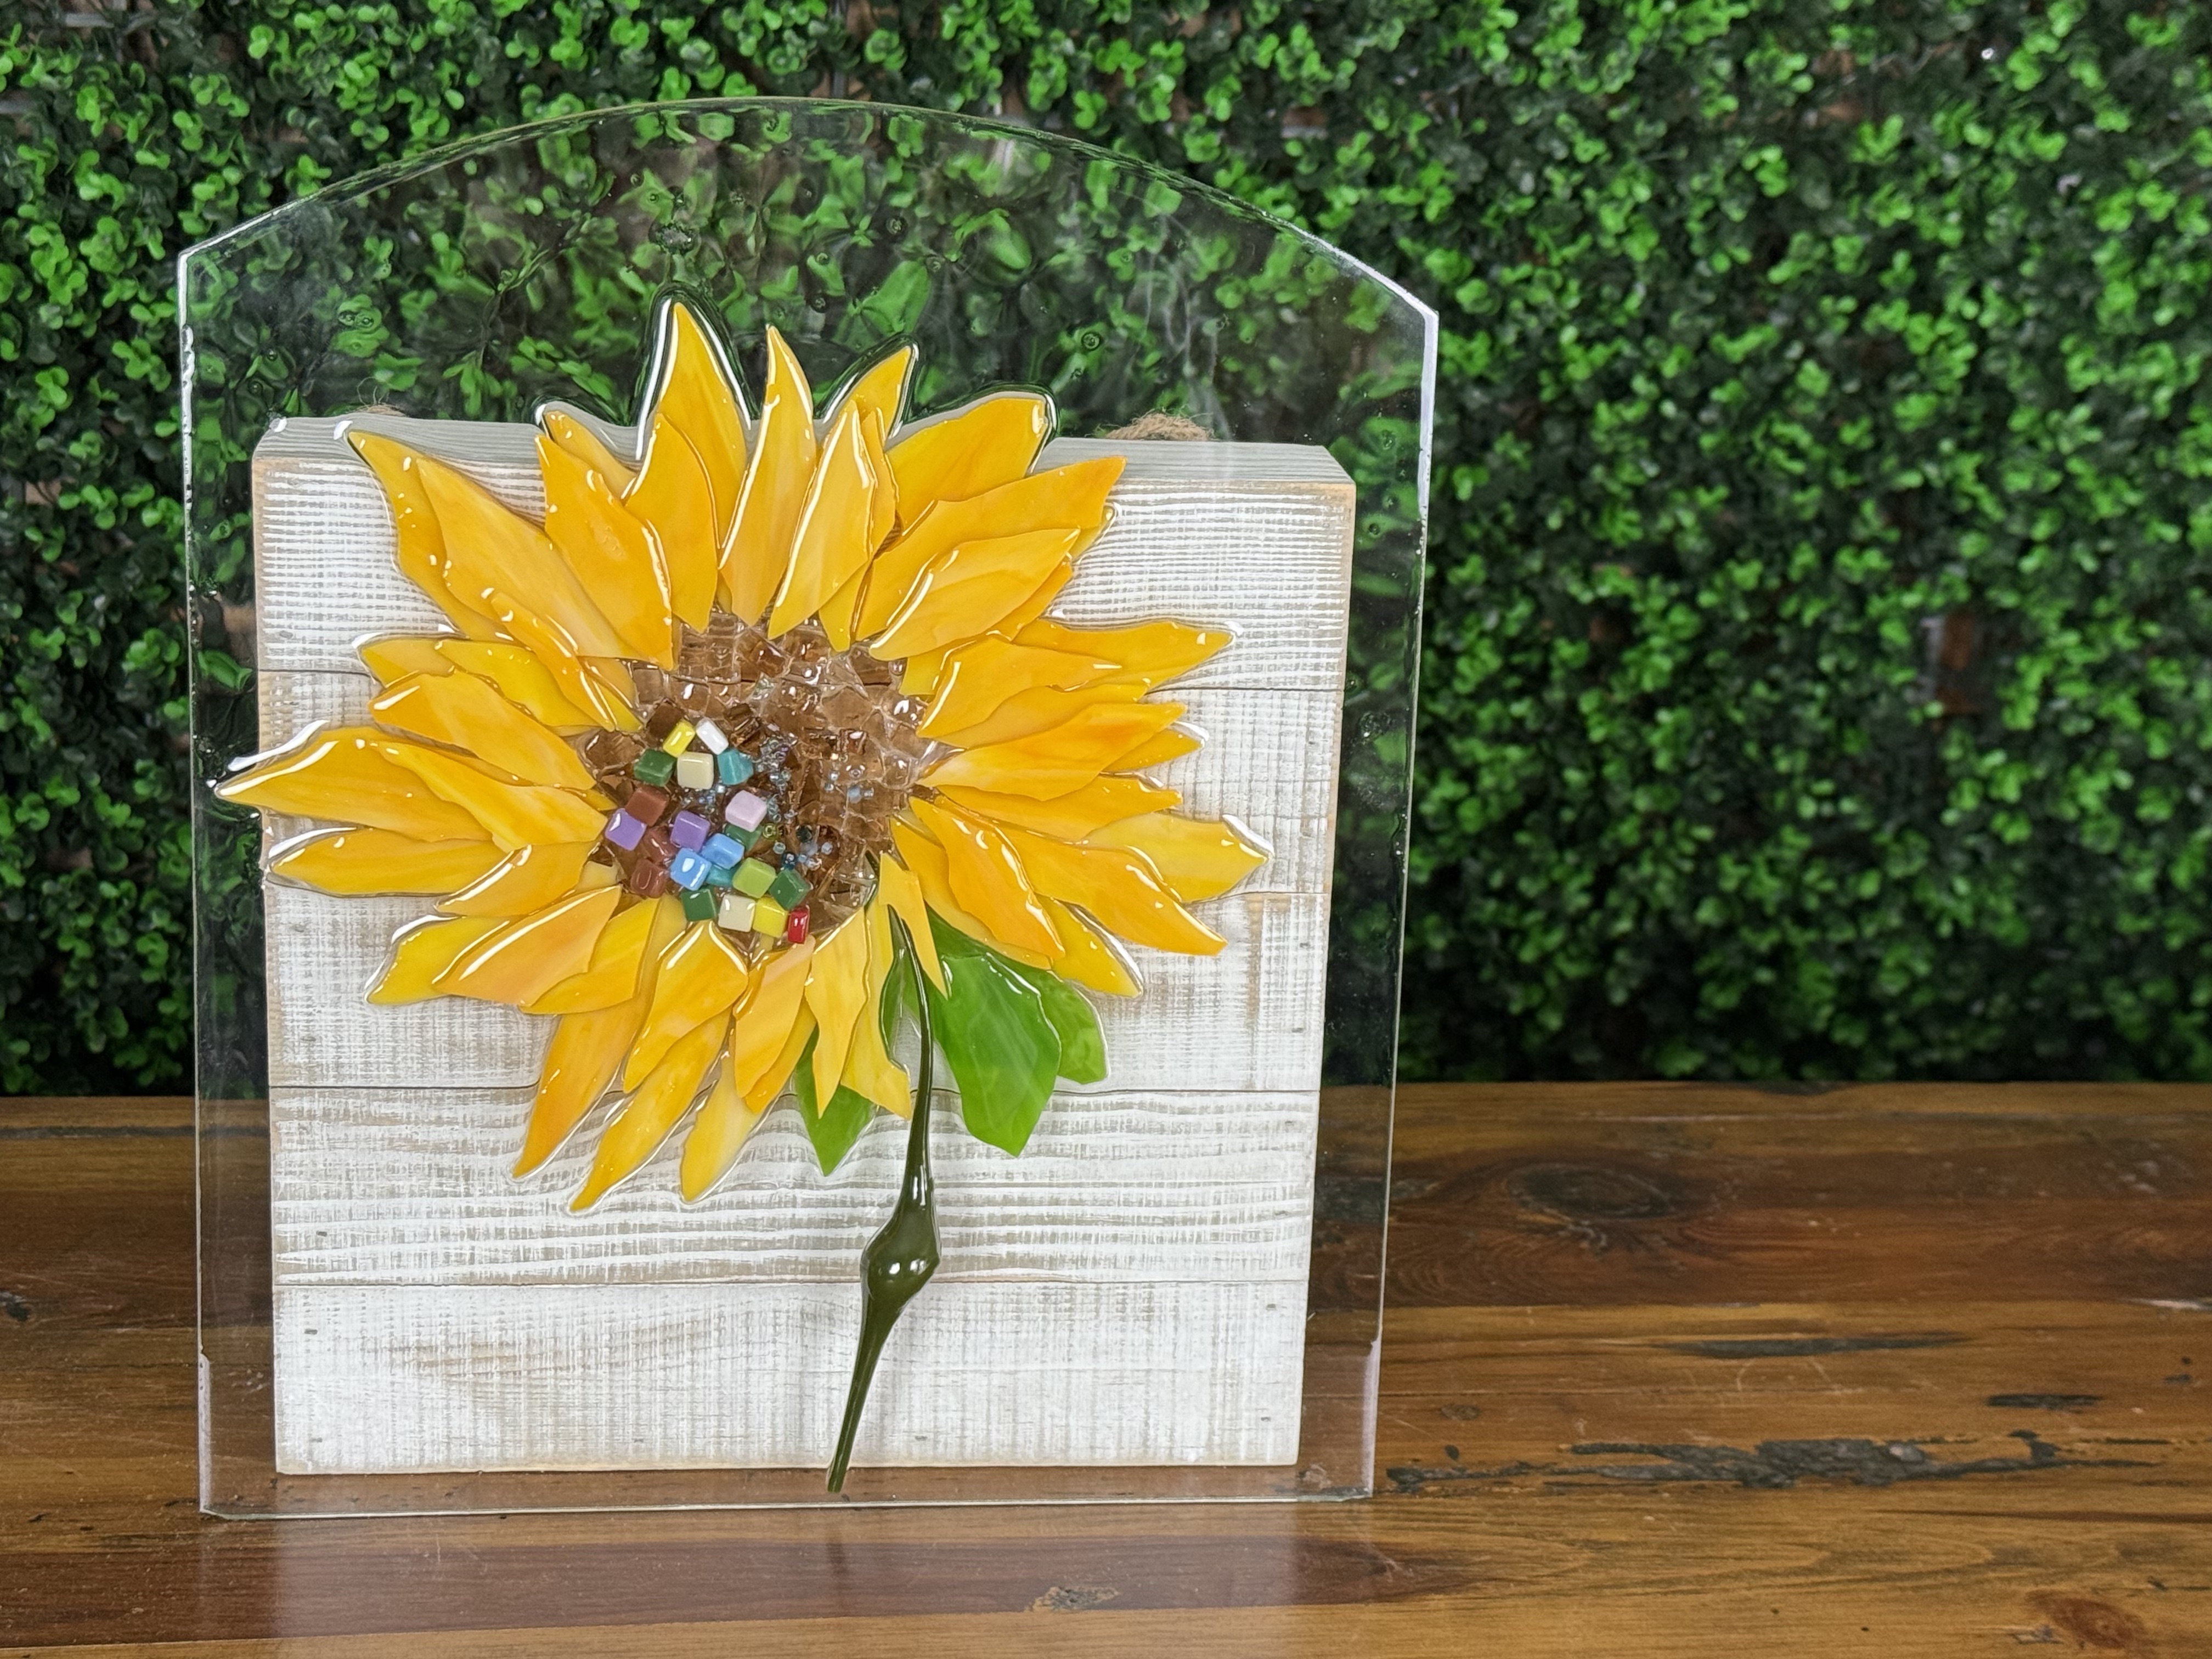
Sunflower Love 🌻
There’s something about sunflowers that feels like instant joy - and when you bring one to life using layers of colored glass and shiny resin, it’s pure magic! In this project, I created a sunflower using glass-on-glass techniques, meaning everything is built directly on a piece of clear glass. I'm sharing how to build your flower from cut yellow glass petals, copper glass, mosaic pieces, and a chunky vitrigraph stem.
I started with a piece of found glass that likely came from a light fixture, but you can use any piece you have on hand. A frame from the dollar store works just fine - just pop the glass out, and you’re good to go. First things first: clean the glass thoroughly to remove dust and fingerprints. Then, wearing gloves to avoid smudging the surface, flip it over and tape off the back. Taping isn’t essential, but it does make cleanup easier if resin drips. If you skip this step, no worries - a razor blade will scrape it right off once it cures.
Once the base is ready, prep your glass pieces. I had already cut most of the yellow petals and some green leaves ahead of time using wheeled nippers and some sheets of glass from Hobby Lobby. Cutting the petals is simple - just snip shapes until you like how they look. Don’t forget to hone your edges for safety. I also pulled out a gorgeous vitrigraph piece from JL Glass to use as the stem. And for the center, I found tiny copper-colored mosaic squares and seed beads tucked away in my stash.
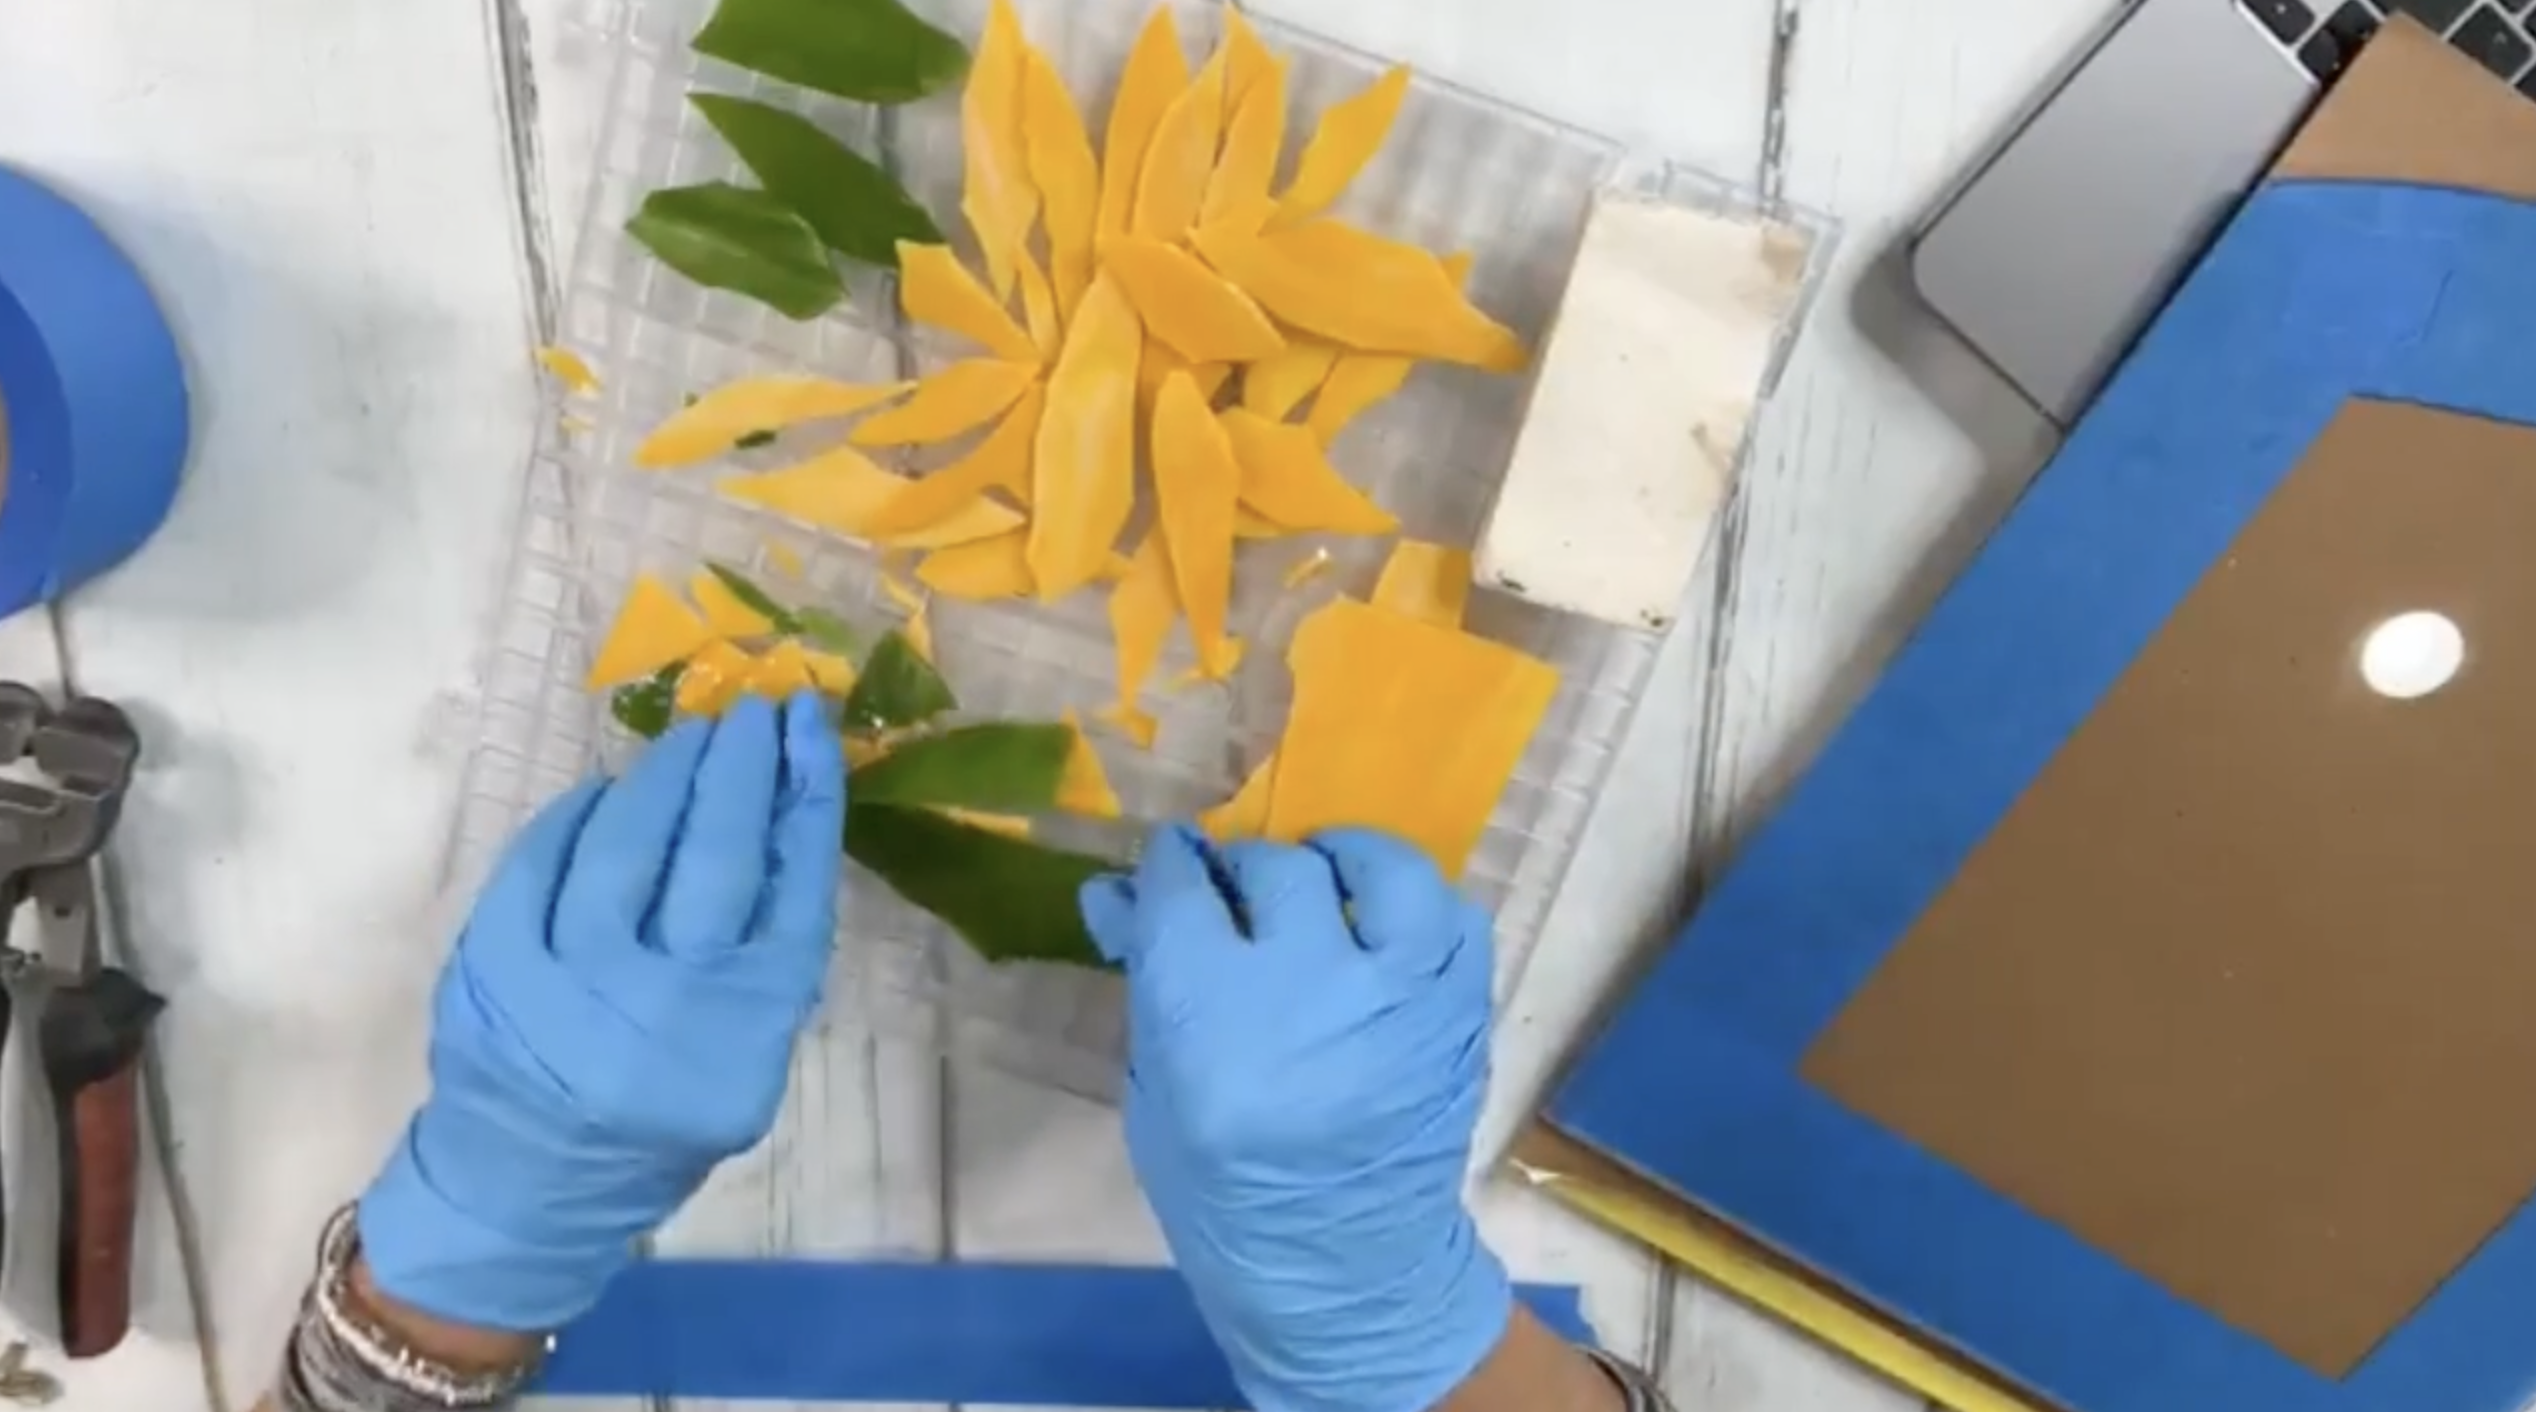
Next, start organizing your petals by size so you are ready to layer once your resin in mixed. Lay your vitrigraph stem down and trim it to where you would like it to fit onto the glass too.
Mix 2 ounces of resin (1 ounce of hardener and 1 ounce of resin), stirring slowly for about 3 minutes. Stirring gently helps avoid bubbles, which can get trapped under your glass. Once mixed, pour a thin layer directly onto the glass base, spreading it gently to cover the area where the sunflower would go. Pop any bubbles with a quick pass of your heat gun.
Then comes the fun part: layering! I laid the stem first, slightly off-center for visual interest, and then arranged four of my largest petals in a cross shape to anchor the design. From there, I filled in the gaps with more petals, creating a circular shape around the center. As I worked, I drizzled resin over each new layer, giving the next set of glass something to grip. I tucked in a few leaves near the base and built up the center with those copper bits and beads, pressing them gently into place with a craft stick and topping them with a little more resin to hold them.
I recommend cutting way more petals than you think you’ll need so you can keep building without interruption. I continued layering until the sunflower looked full, finishing with some of the smallest petals for a delicate top layer.
Once everything is in place, give the piece a final heat gun pass to remove any lingering bubbles. Sprinkle in some seed beads and a few more copper mosaic pieces to the center for that extra sparkle. Let it cure flat, untouched, and undisturbed.

If you don’t want to miss my Facebook LIVE art instruction, make sure you are on my texting list. I always text 10 minutes before I’m going to go LIVE, so you won’t ever miss it. You can text “Hey Cindy” to 901-519-2923.
Want more inspiration and artwork?
- My website artshattered.com with resources, shop, and more!
- My creative membership The Shattered Circle, where you can explore the world of glass art with online workshops, a supportive community, and more!
- My mini creative membership Just A ‘Lil Bit Monthly Glass Art Club, where you’ll get a new quick and easy online tutorial for just a lil' bit of sparkle in your life!
- My Facebook page where I go LIVE every Wednesday night at 5:00 PM CST.
- My YouTube channel which has tons of free art lessons right at your fingertips.
