Buttons Snowman ⛄️
We are using a large 8x16 canvas to create a snowman art piece! This one is great for the holiday and winter season! I'll show you how to paint this from start to finish as well as add some fun embellishments, like real buttons, glass, and floral pick elements.

Grab your tracer, tape it to your canvas, place graphite paper underneath, and trace your snowman onto your canvas with a stylus. I am going to sketch mine out, but you can use the tracer if you would like to.
Next, I'm going to add a coat of white paint to my snowman and a coat of black paint to his hat. Dry with a heat tool.
Paint his scarf with Cherry Red paint and paint the nose with Red Spice. Dry again with a heat tool.

Let's add details! Add a quick coat of white on the snowman and add Slate Grey paint around the edges to add some shadowing. Add a second coat of black paint to the hat and then add in white for highlights. For the nose, I'll add more Red Spice and then Burnt Umber for shadows and white for highligh...
Red Mitten ❄️
We are using an 8x10 canvas to create a fun Christmas scene of a mitten filled to the brim with lots of fun holiday pieces. I am going to show you how to paint this from start to finish as well as how to add glass and other goodies to your art piece. This is a fun simple project perfect for the holiday or winter season!

Let's start by painting our background with a coat of white paint. Then, I'm going to add in some Desert Turqoise, applying it in a curve going in one direction. I'll also add some more streaks of white to tone it down. Dry with a heat tool.

Grab your tracer, tape it to your canvas, place graphite paper underneath, and trace your mitten onto your canvas with a stylus.
Paint your mitten with Cherry Red and the cuff of your mitten with white paint. Next, we are going to work on our pine needles. I'm going to use Avocado mixed with water to create an inky consistency. Load your brush, twirl some off, and lightly paint your branch and add swoops of pine needles. Pain...
Rose Gold Ornament 🎄
We are making a cute little rose gold ornament art piece, complete with holly berries made from beads and lots of rose gold glass. I absolutely love the combination of colors on this one, and the best part? It is so easy to create! If you are just getting started in your glass art journey, this one is for you!
We are going to start by painting our background with Metallic White. I'm also going to add some Splendid Gold, adding streaks in a diagonal direction to give it some texture. Dry with a heat tool.

Find something round that you can use to trace around to create your ornament on your canvas. I have a plastic ornament half to use, which worked perfectly. I'll also sketch on my ornament topper, holly leaves, and evergreen branches.
I'm going to paint the ornament with Rose Shimmer and the top with Splendid Gold. I'll paint my holly leaves with a base coat of Hauser Green Light. Dry with a heat tool.

Add another coat of gold to your ornament topper and another coat of Rose...
Green Glass Wreath ⭐️
We are making the easiest holiday glass art piece - a green glass wreath! This one requires very minimal painting (just your background) and all of the fun glass goodies you can find. I'll be using lots of green glass as well as tons of miniature Hobby Lobby Christmas stuff and a gorgeous glass flower that I made from a broken ornament. Use what you have and get creative!

I'm going to use Metallic White and Metallic Green for my background. When I use metallics, I like to apply them with a sponge brush because it lays out the metallics really nicely. Start by adding a coat of Metallic White with vertical strokes and then add a little bit of the green, pulling from top to bottom. Dry with a heat tool.

Grab a cup (whatever size you would like the center of your wreath to be). I am using a 16 oz tub that I use for mixing resin. Place it in the middle of your canvas and add handfuls of glass around your cup. I am adding Green Reflective, Solex Reflective, and Solex. Remove your cup.
...Black Stenciled Pumpkin 🖤
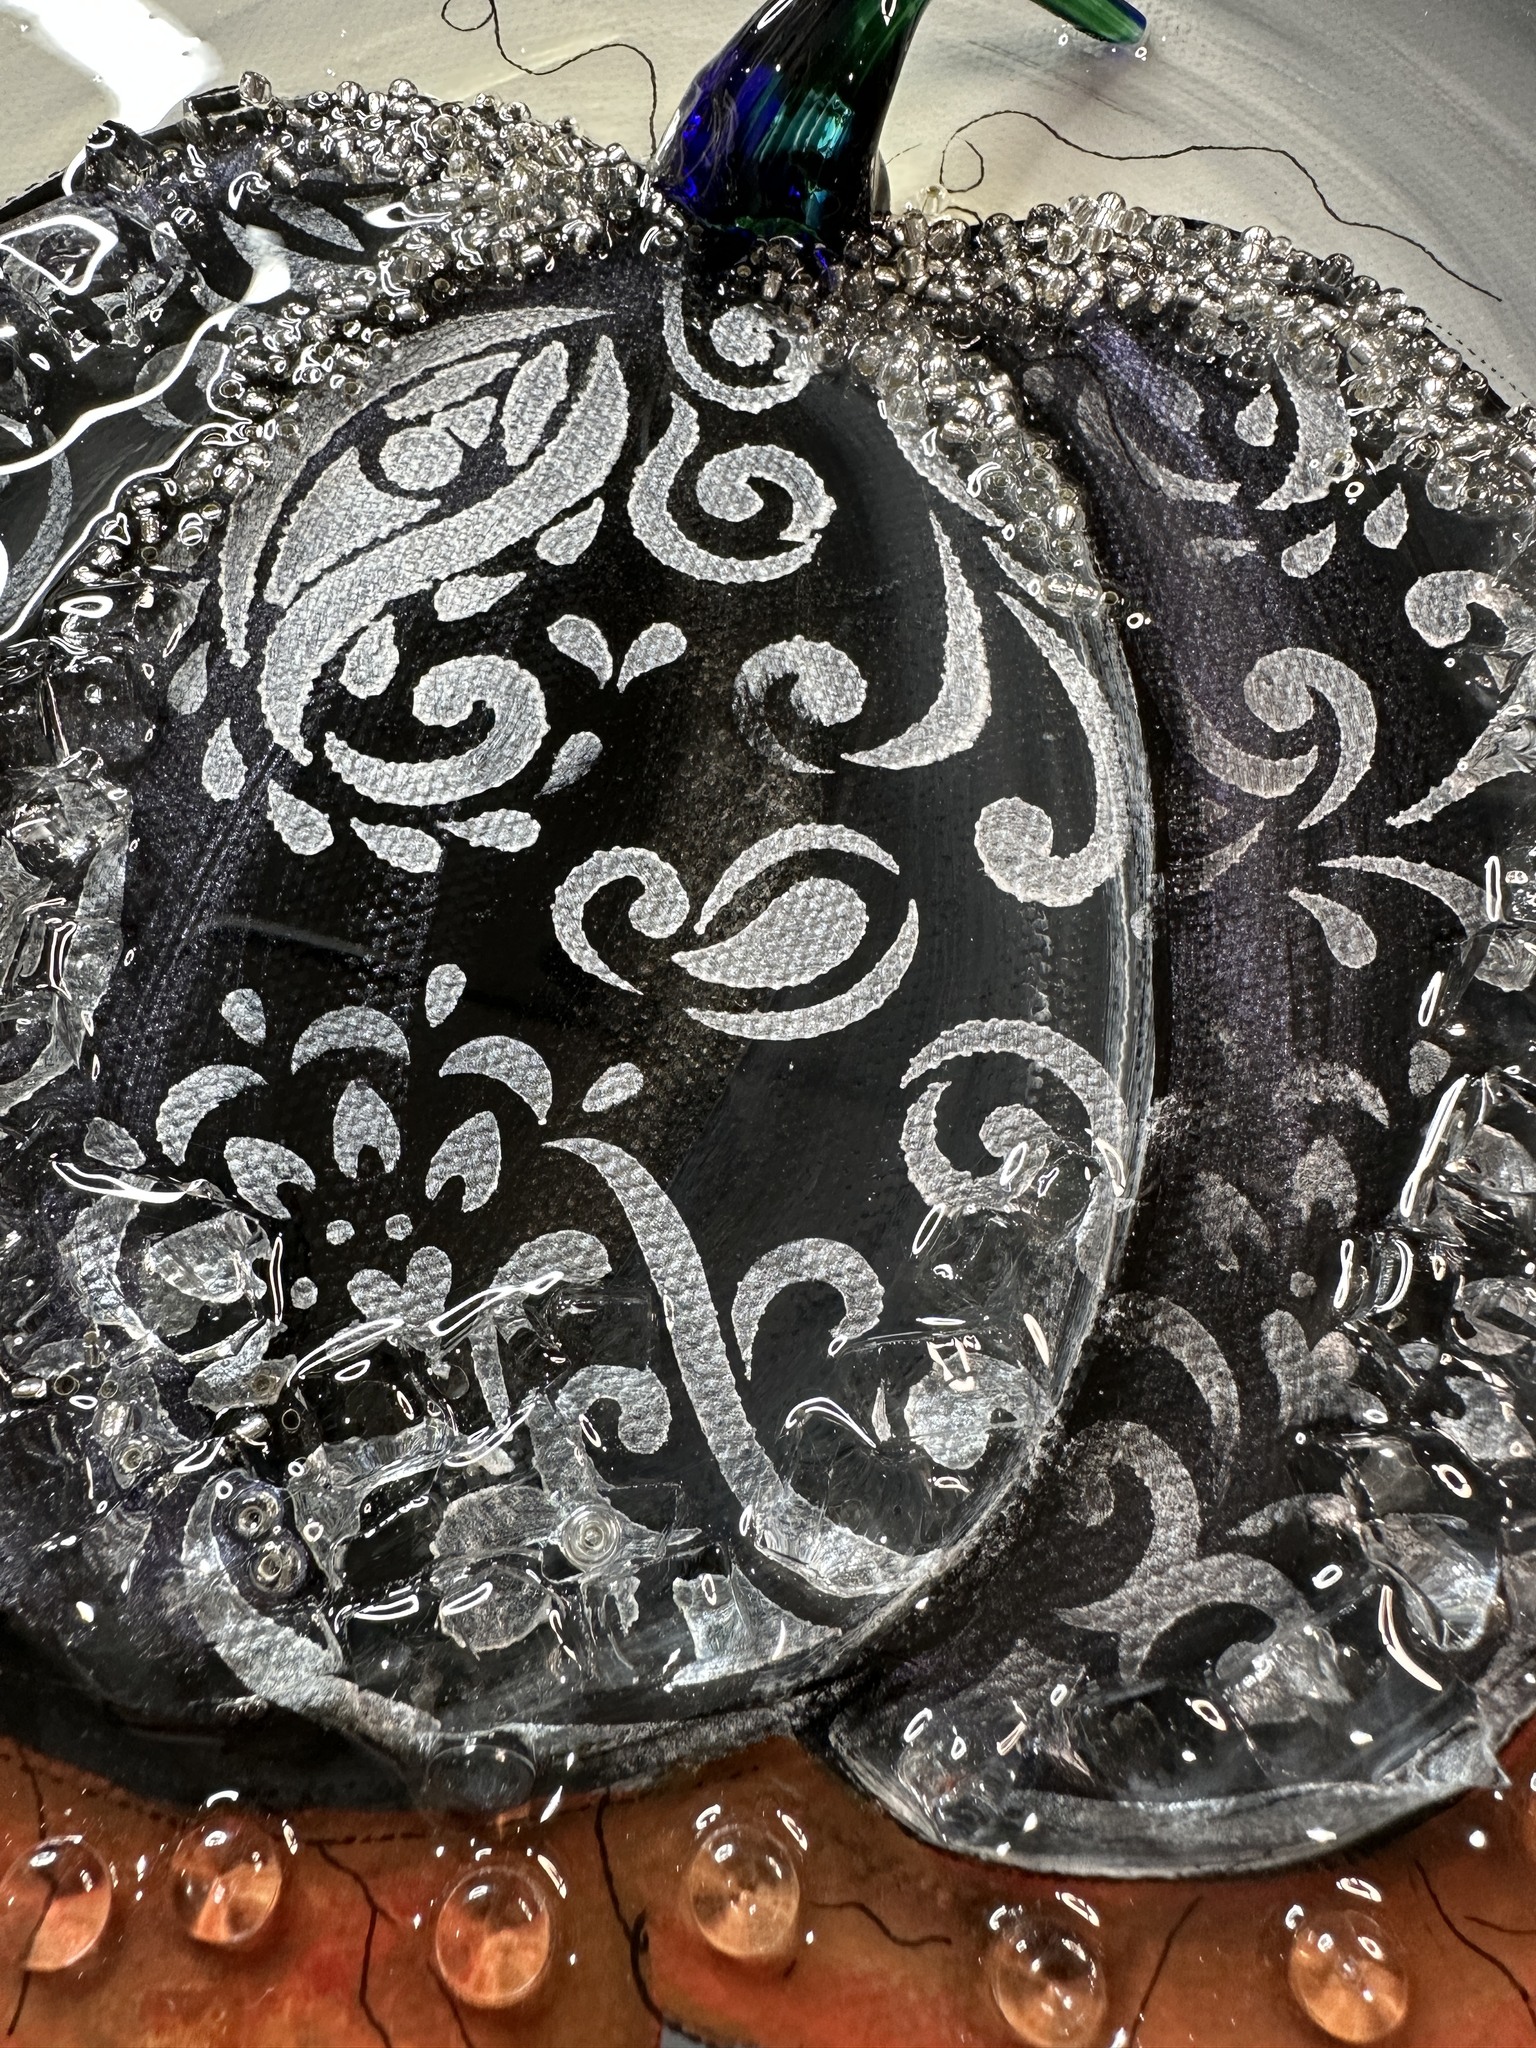
I am doing one last pumpkin - and this one is going to be black with some pretty stenciling, painted leaves, and lots of glass goodies! I am adding a stunning glass stem along with some Starfire glass, seed beads, and bubbles. The stencil really pops on this pumpkin, and it's the perfect fall project!

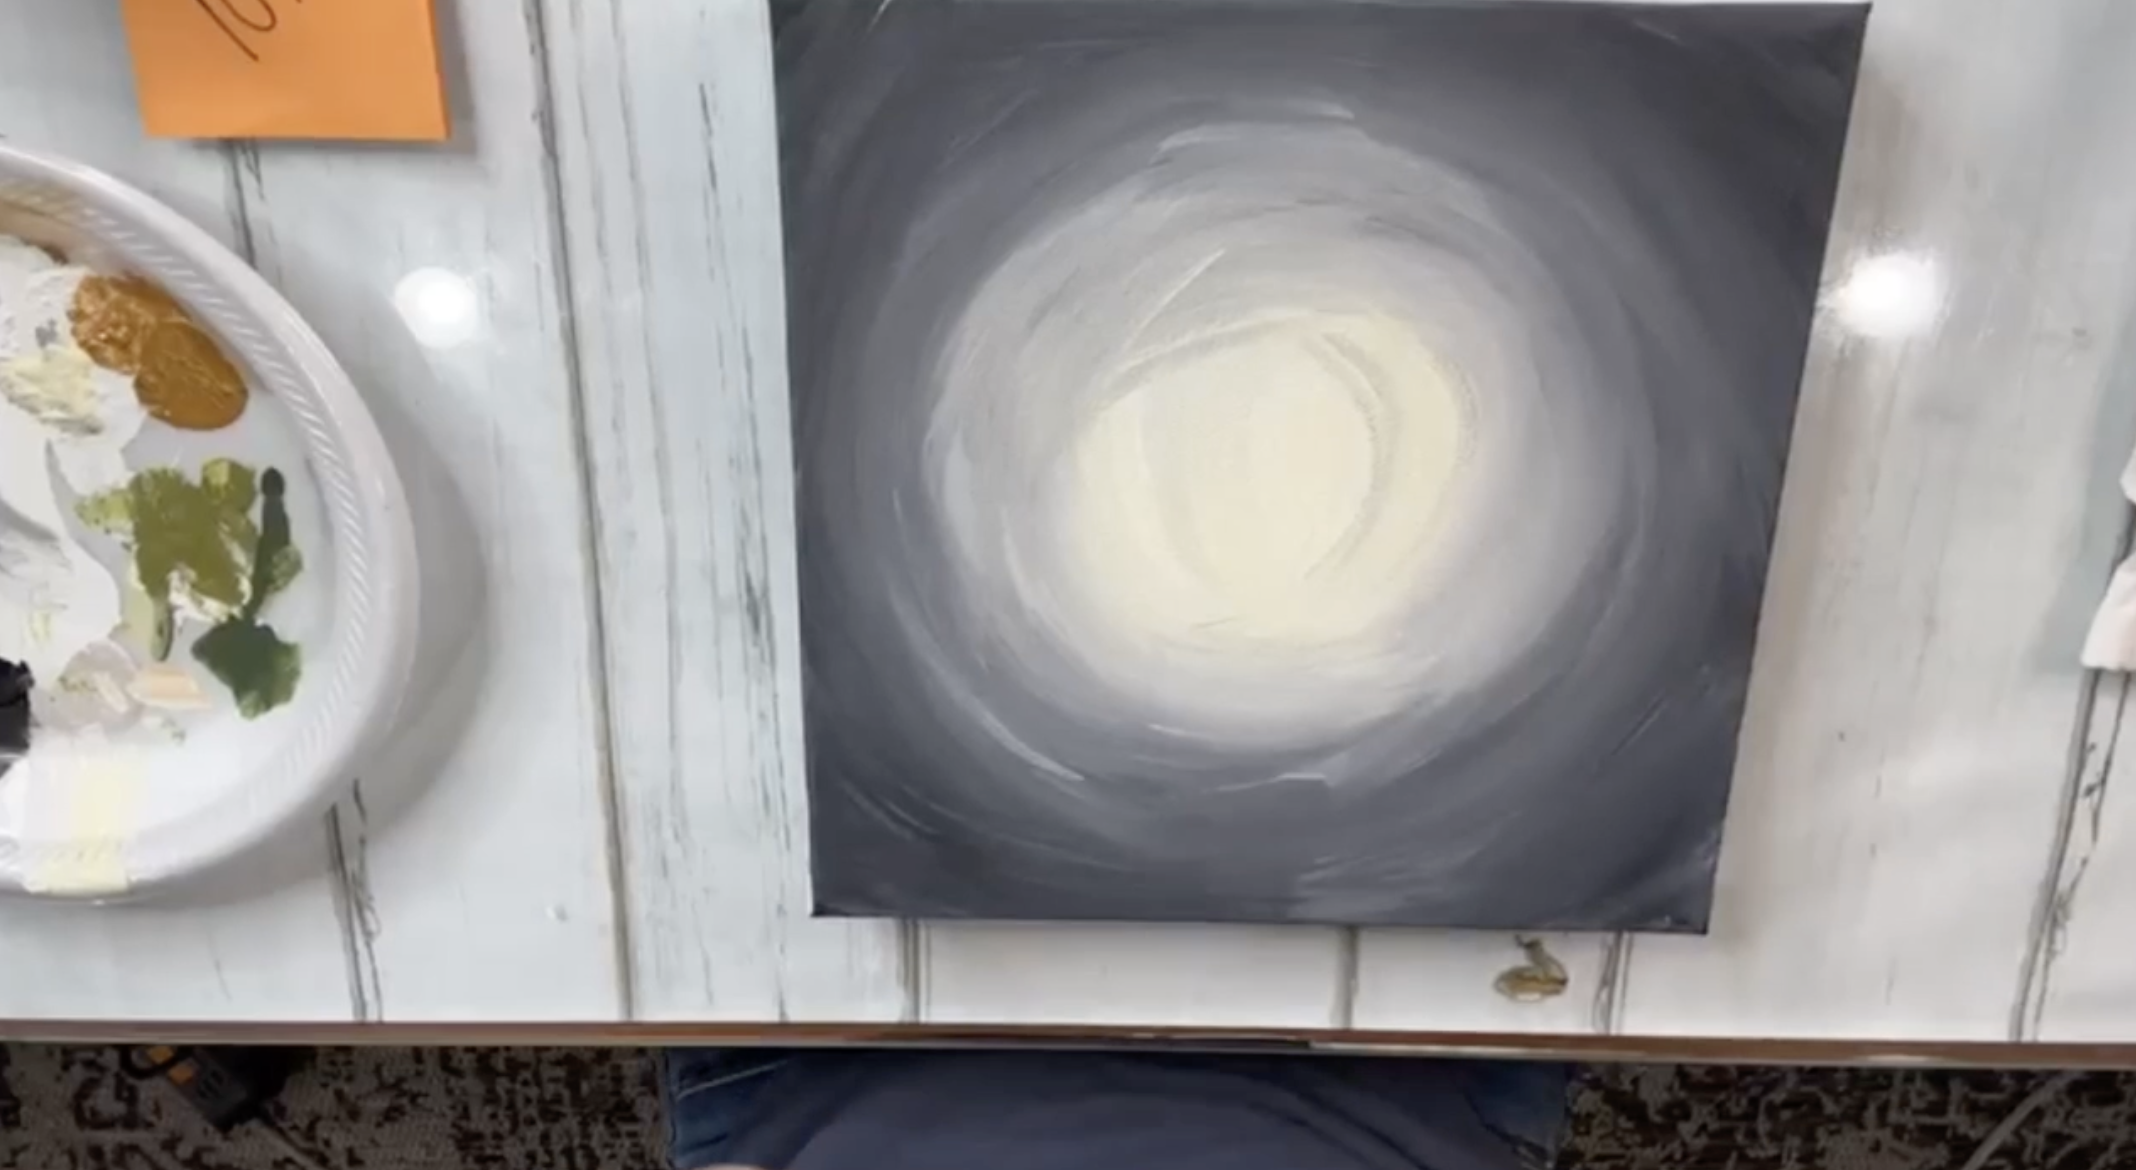
We will start by painting a nighttime background on our 10x10 canvas. I am using a 1-inch paintbrush and adding white paint to the middle in a circular motion and then adding some Buttercream paint and black paint too. Dry with a heat tool.

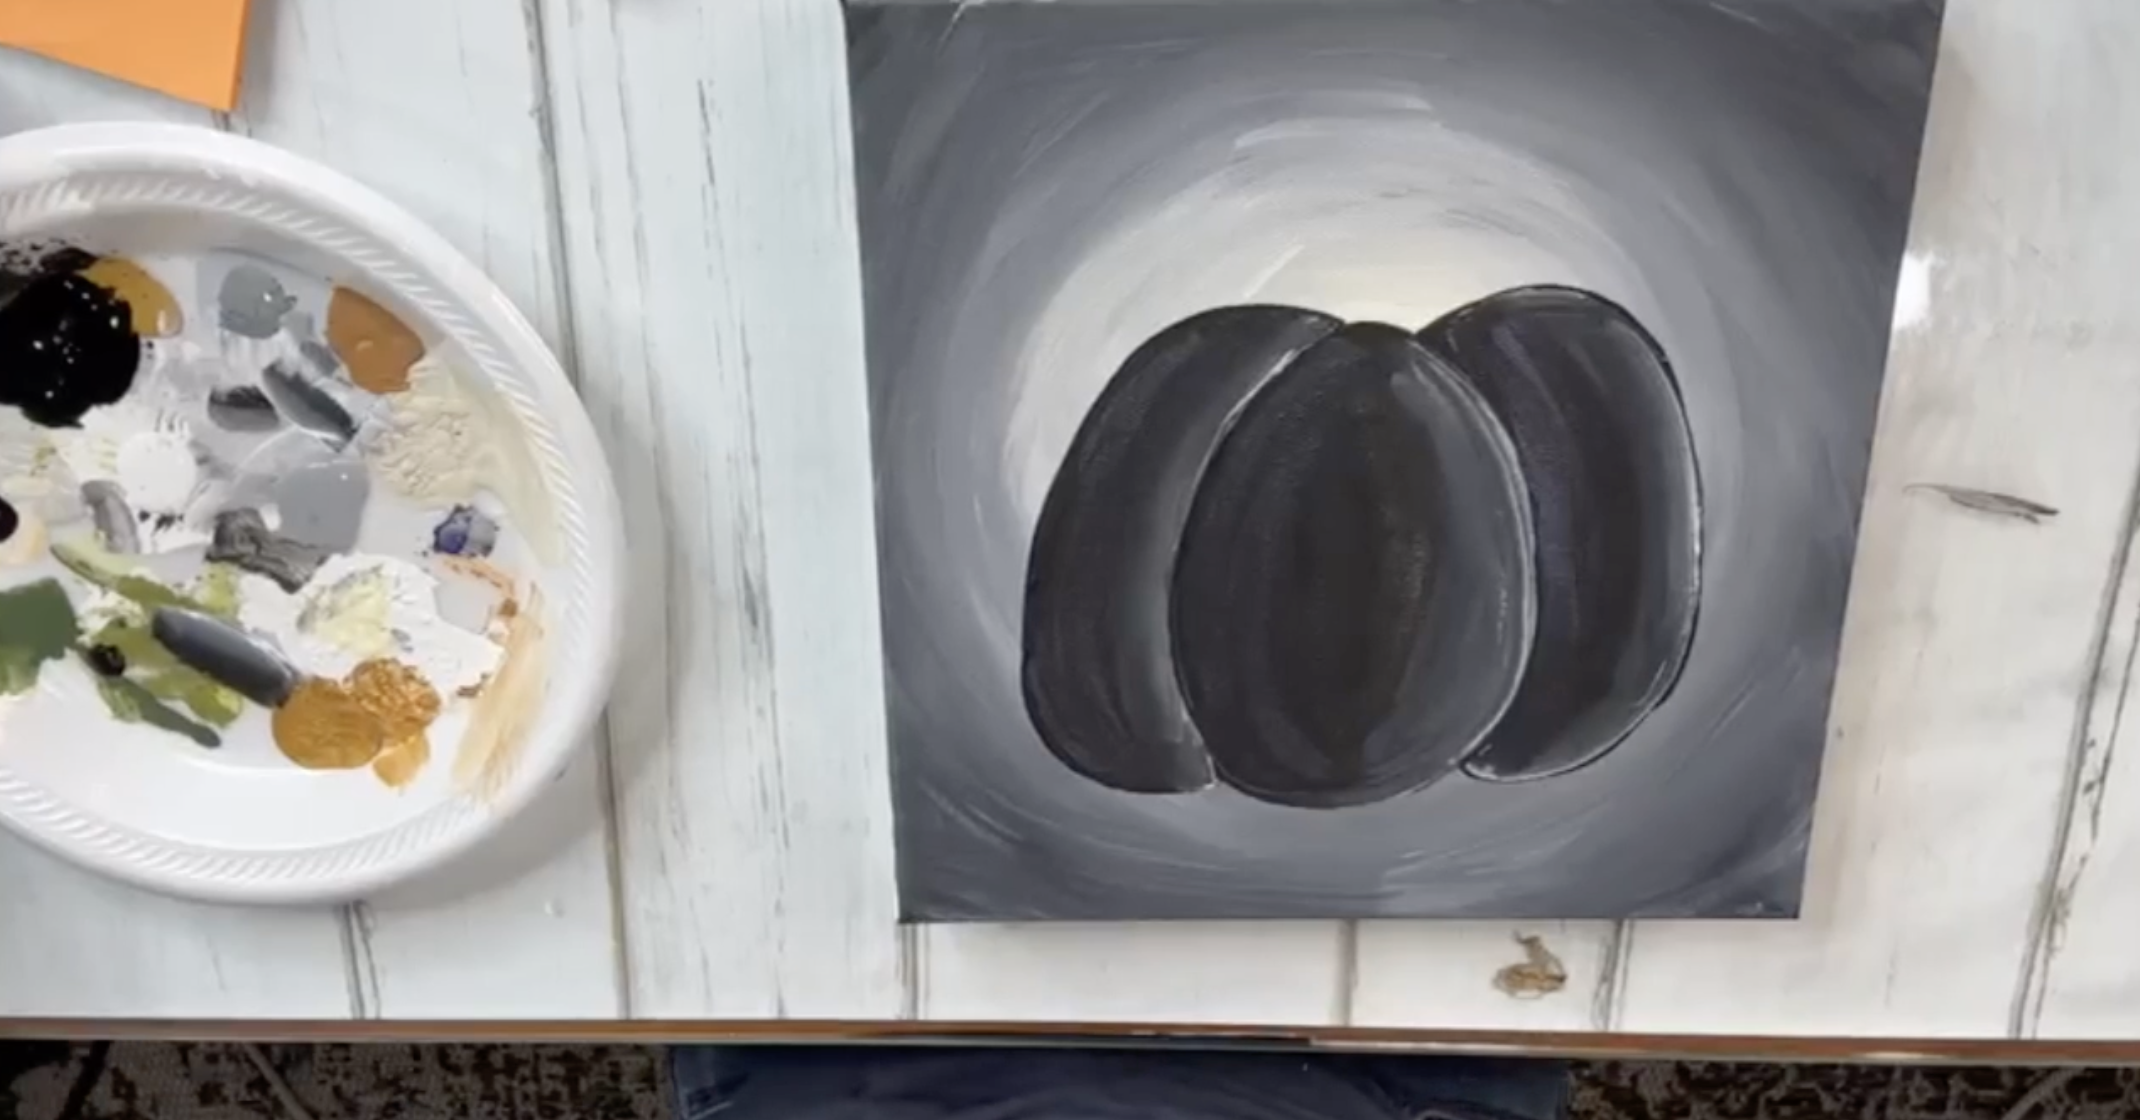
Grab your tracer, tape it to your canvas, place graphite paper underneath, and trace your pumpkin onto your canvas with a stylus.
Next, add a basecoat of black paint to your pumpkin, painting each section at a time. Add some white paint to the right side of each section to create a highlight and some Metallic Amethyst to the left side. Dry with a heat tool.

Now, I'm going to paint some leaves underneath my pumpkin on the bottom. Grab your tra...
Pumpkin On Wood 🎃
Let's work with a different kind of surface! Today, we will be creating a pumpkin on a piece of wood - this is a stained 2x4 cut to 6 inches long. We will be adding all of the glass goodies and a super fun glass stem that will make your artwork really stand out! This would make such a great shelf sitter in your home for the fall season.
I like to stain my entire board and then cut it. This is stained with a dark walnut color - just brush it on, wipe it off, and let it dry.
For my background, I am going to use a palette knife to apply my paint because I want this to look a little more distressed and rustic. I'm going to use white paint and Forest Moss. Use the flat backside of your palette knife and lightly drag the paint onto your wood with a back-and-forth motion. Dry with a heat tool.

Next, I'm going to sketch on a pumpkin. Make an egg shape and make parenthesis shapes on either side. Pumpkins never look perfect! I'm going to use Honey Brown to paint my pumpkin. Dry with a ...
Cream Pumpkin 🤍
We are making a simple and elegant Cream Pumpkin art piece! We will be using some fun green vitrigraph pieces as well as Starfire glass and seed beads to add all of the sparkle. I love the way that this turned out and how monochromatic and neutral the colors came out - I only used five paint colors to make this!

Grab your tracer, tape it to your canvas, place graphite paper underneath, and trace your pumpkin onto your canvas with a stylus.
First, apply a coat of Snow White to your pumpkin. Then, paint the leaf with Forest Moss. Dry with a heat tool.

Next, paint each pumpkin section one at a time. Add a coat of Snow White and then add highlights with Bleached Sand and shadows with Granite Gray.
Add a second coat of Forest Moss to the lead and then add some white paint for highlights and Avocado Green for shadows. Dry with a heat tool.

Grab a graphic pen and add some detail lines. I am adding short strokes around my pumpkin and leaf. I'll also paint my background with Metalli...
Colorful Textured Pumpkins 🎃
I grabbed a pack of 9 little canvases (they are 4x4) that I will be using to create little textured pumpkins. This is such a fun and easy fall project, and these little canvases make perfect gifts or shelf-sitters in your home! We will add modeling paste, paint them, add a glazing medium, and then apply resin with seed beads and glass. I love the way each of these colorful pumpkins turned out!

I am going to sketch my pumpkin onto my canvas with a pencil. This will help guide you as you go. These are super simple to draw - sketch a stem, then an egg, and parentheses on each side of your egg.
Next, I am going to use a little palette knife to apply my modeling paste. Start with the stem and use the back of your palette knife to add the paste. Then, continue adding plaster to one section of your pumpkin at a time. Let this dry overnight.

Now, you can paint your pumpkins! I am going to start by painting my first one with Dragonfruit pink. I am going to add a base coat of pink and th...
Pumpkin Gnome 🎃
We are doing this fun pumpkin gnome on a 4x12 canvas! This is the perfect fall art piece to create for a gift or some festive home decor. I will show you step-by-step how to paint this gnome from start to finish! Learn how to create this quick and easy gnome art piece.

Grab your tracer, tape it to your canvas, place graphite paper underneath, and trace your gnome onto your canvas with a stylus.
I am going to start by painting his beard. First, add a coat of white and then mix in some black to create a gray beard. Then, paint his hat and shoes with black paint. Paint his hat brim and pumpkin with orange paint. I'll also mix in some yellow and black to my pumpkin to create some shadows and highlights. Use brown paint for the stem. Finally, I'll use Cool Bisque (a peachy color) to paint his nose and hands.

Now we will add our details! Where the hat bends, I am going to add some highlights with white paint. Then, I'll paint a little patch with green and yellow paint with some white...
Witchy Pumpkin 🧙♀️
We are creating a fun Halloween 8x10 art piece complete with lots of black glass goodies and other extras. I have a sunflower, pinecone, and acorn that I cut off of a floral stem, and I have a rustic metal star that I cut off from a garland. I am going to show you how to paint this from start to finish and add all of the fun elements and resin. This is a simple, easy, and fun fall art project!

Grab your tracer, tape it to your canvas, place graphite paper underneath, and trace your witchy pumpkin onto your canvas with a stylus. Start by adding white paint all around the background of your canvas and then add in some Antique Gold. I like how this is darker around our witchy pumpkin and then gets lighter as it goes out.
On the bottom of my canvas, I am going to add black paint and then add some white streaks in it.

Next, we are going to paint the witch hat with black paint and the hat band and underside of the hat with purple. Dry with a heat tool.
Add a base coat of Spiced Pumpk...


