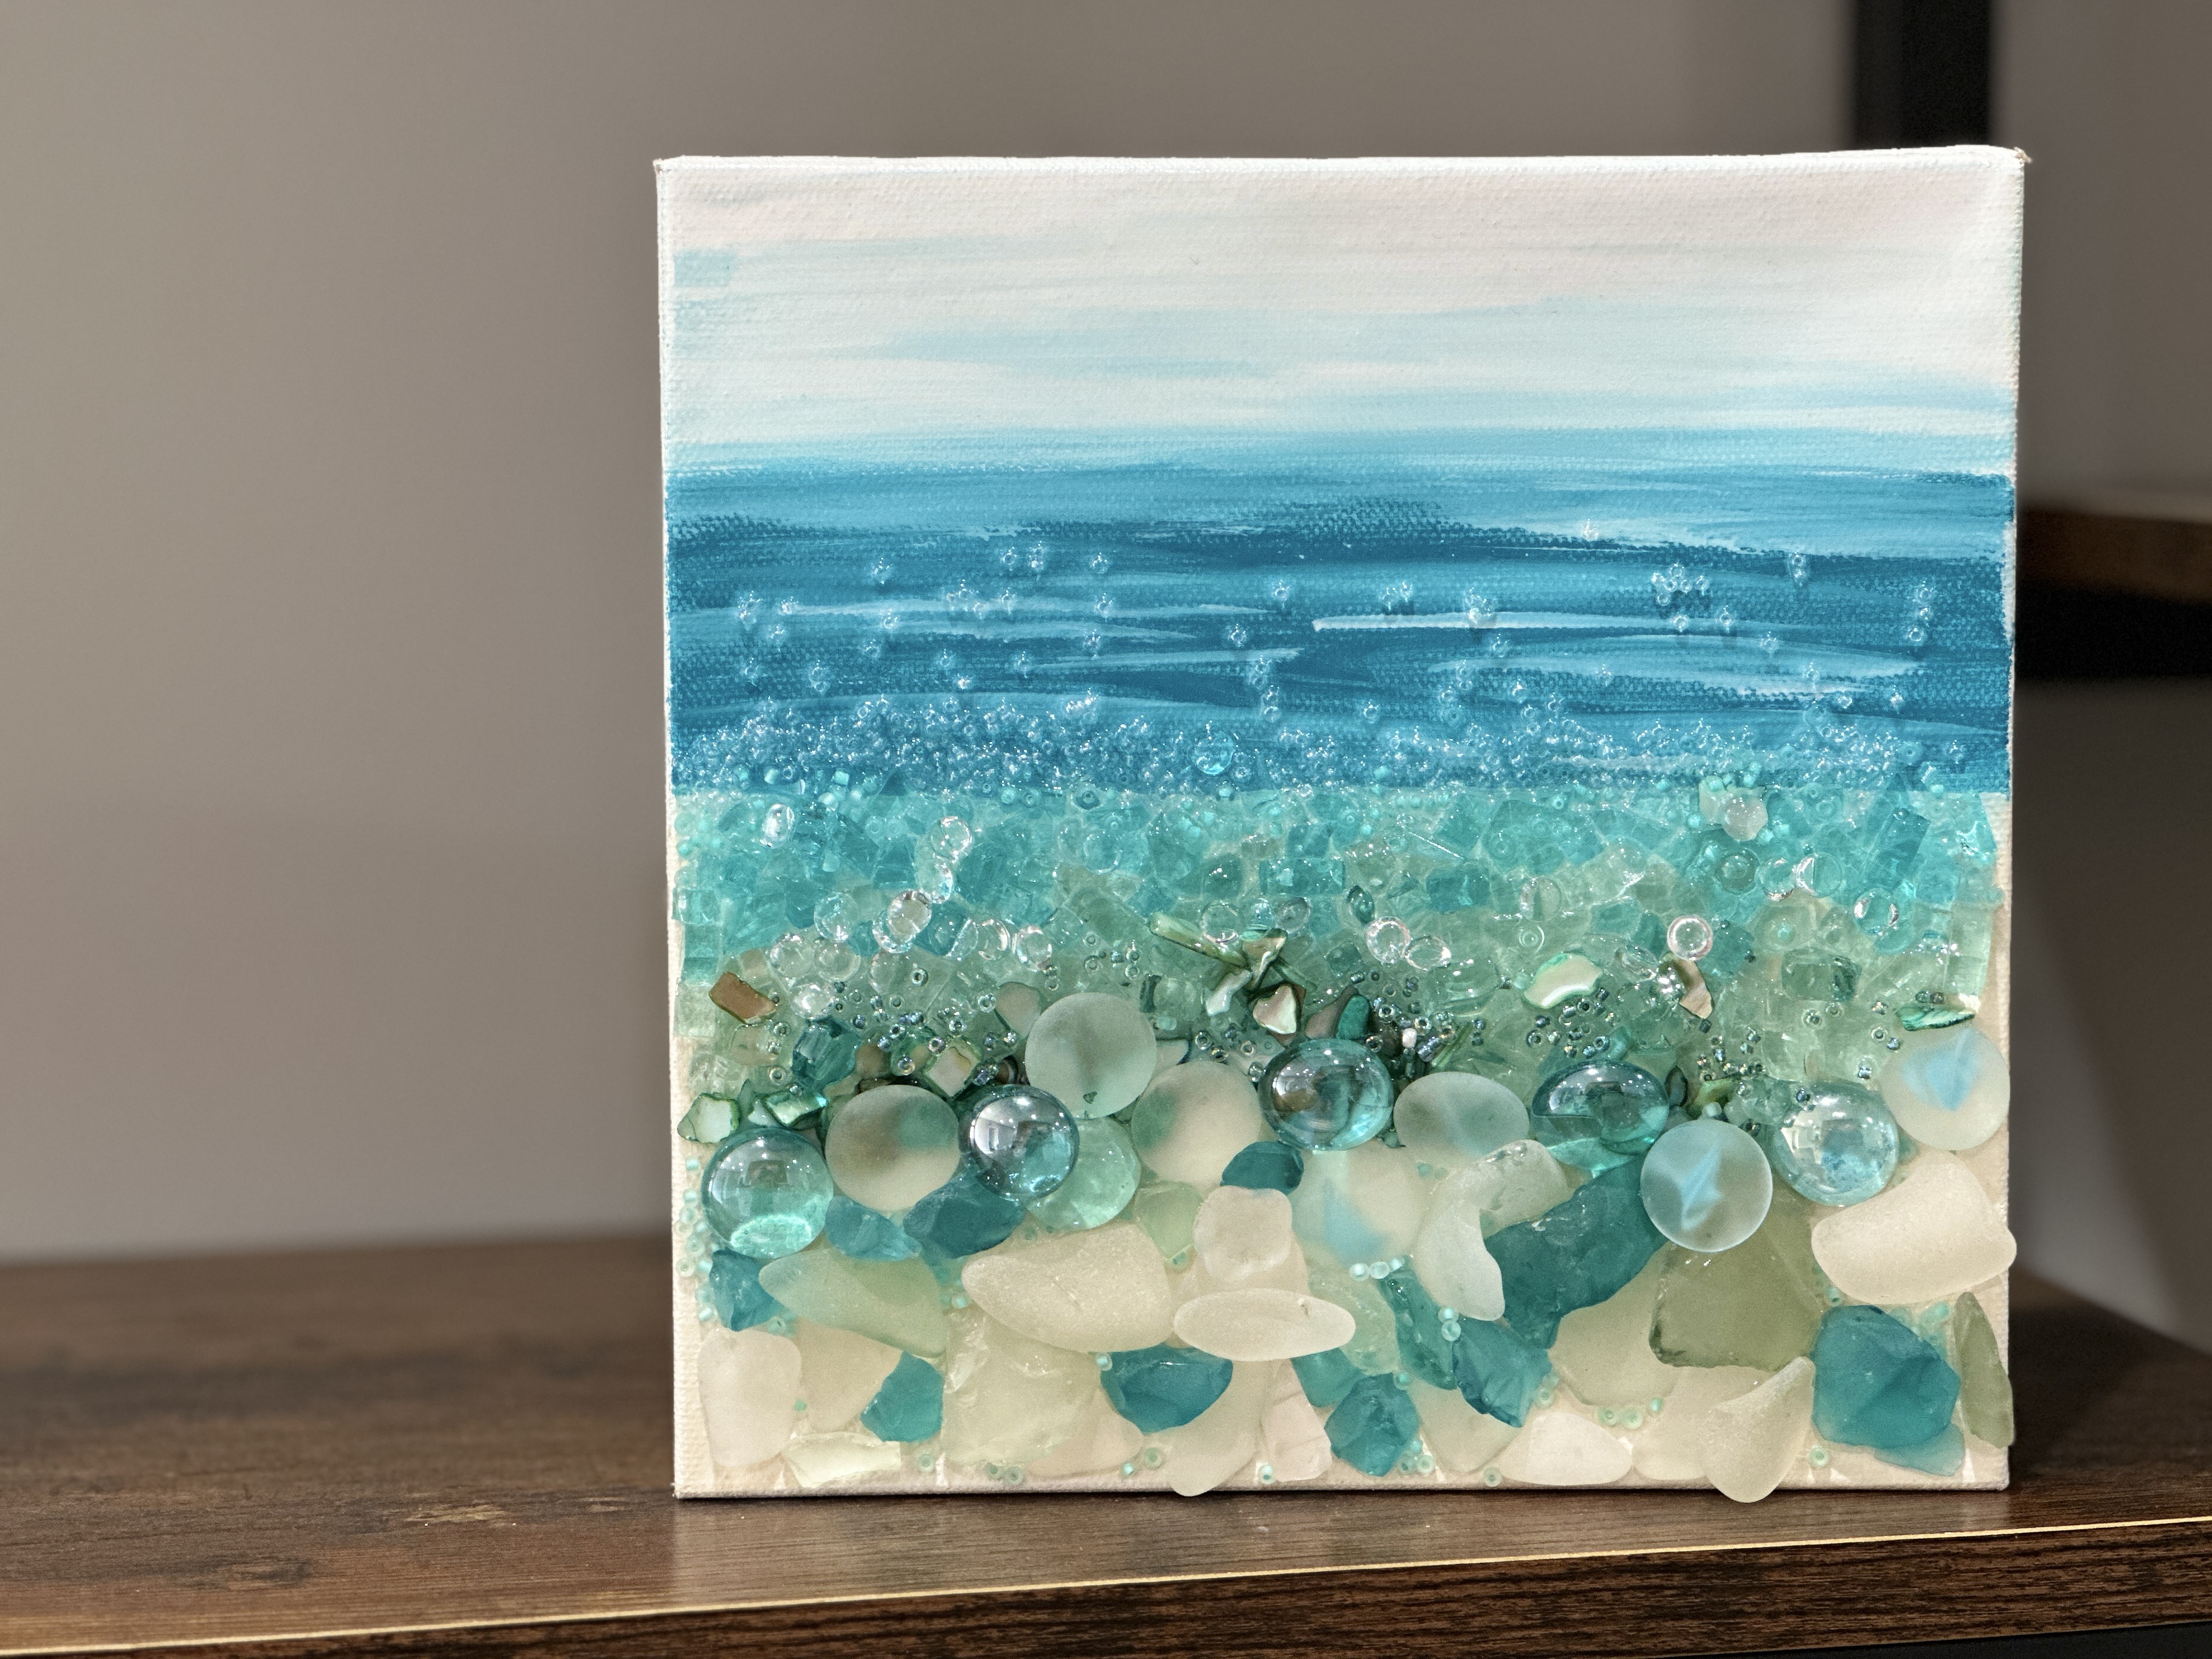
Seaglass Beach 🌊
I am dreaming of the beach, so we are going to squeeze in one last beach art piece before the summer is over! We are working with an 8x8 canvas, and this art project has minimal painting and lots of glass goodies. We'll be adding sea glass in blues and greens, tinted seashells, Caribbean Blue and Solex glass, flat gems, seed beads, bubbles, and more!

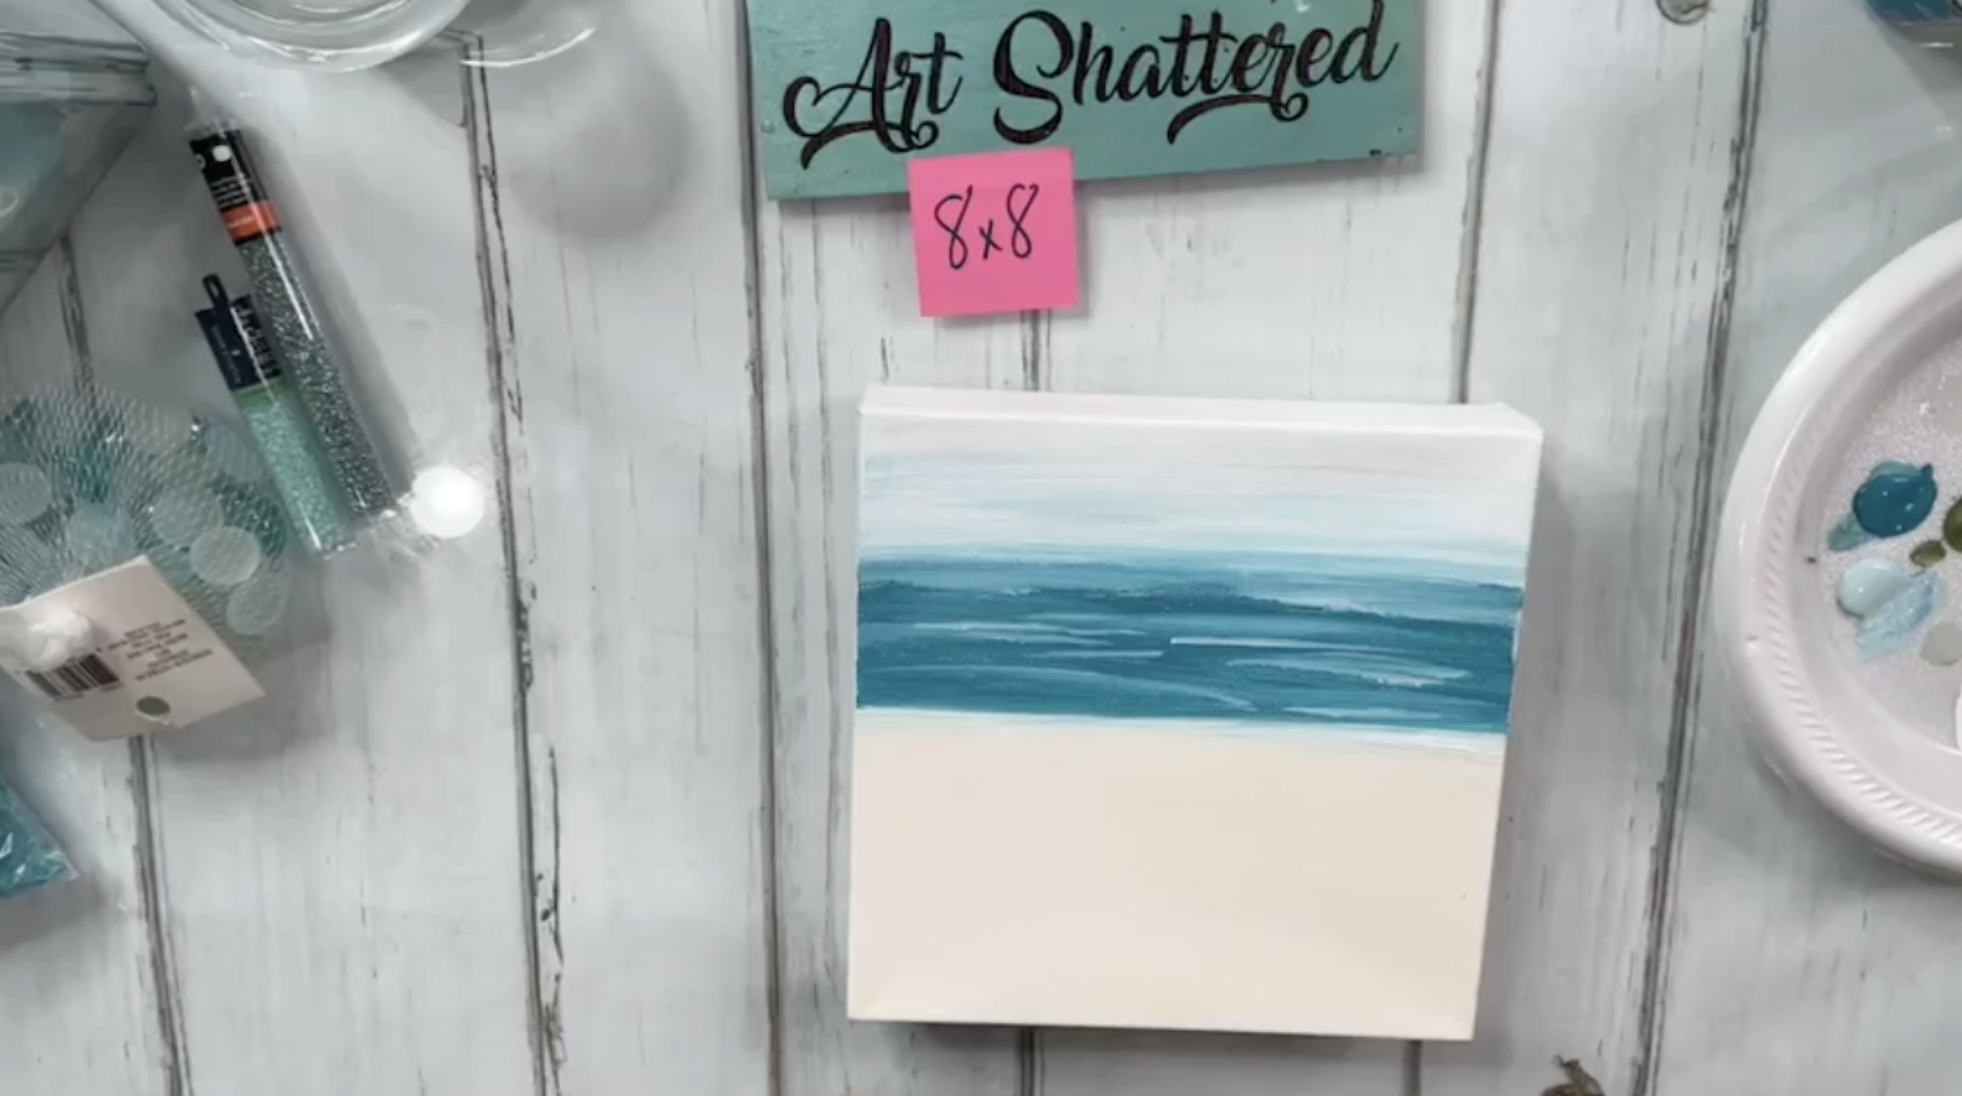
First, I am going to paint a beach background. I am going to paint the lower portion of my canvas with Vintage White for the sand. Then, I'll use Spa Blue, Castaway, and white paint to create my ocean and sky. I'm using Castaway for the ocean and going lighter towards the top of my canvas, blending the colors together. Dry with a heat tool.

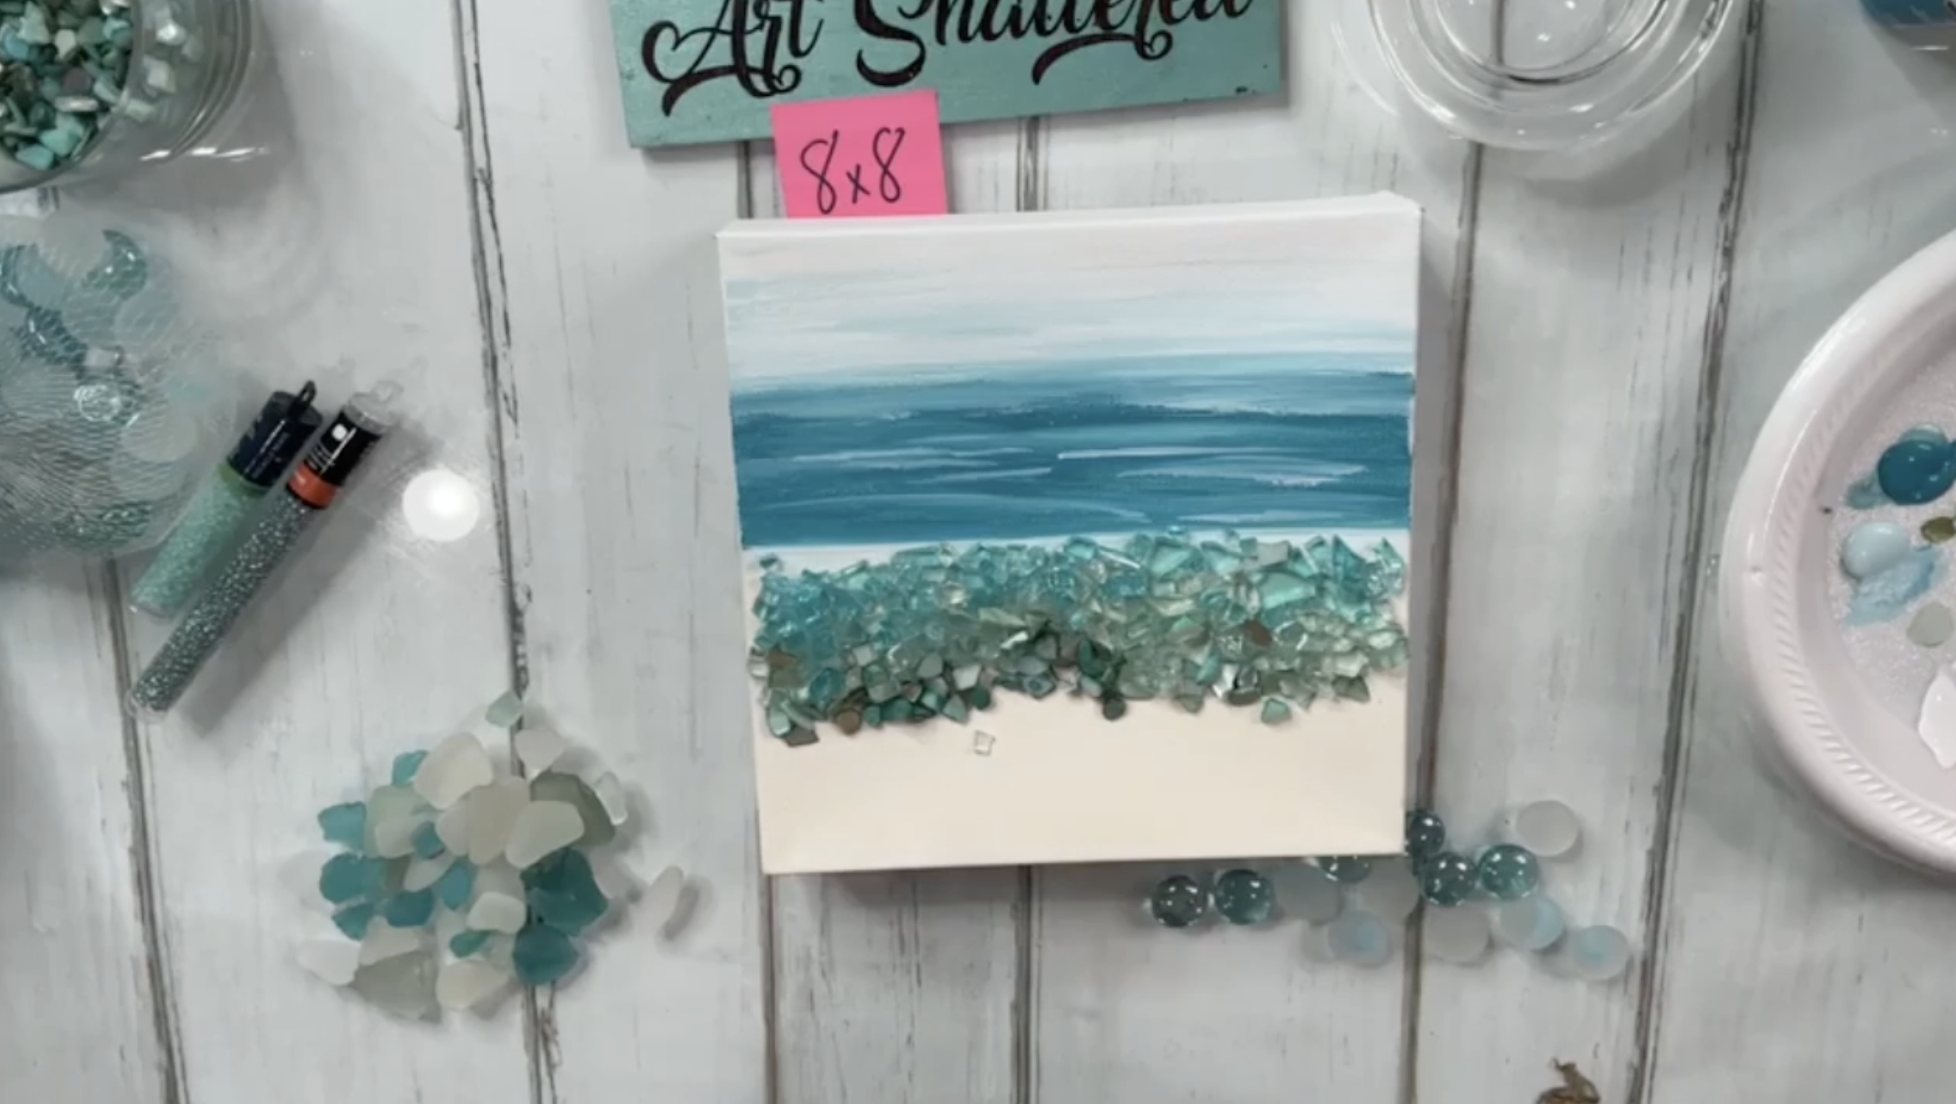
Next, I am going to lay out some of the glass onto my canvas. I am adding the Solex glass, Caribbean Blue glass, and tinted seashells right where my sand and ocean meet. (We will add the rest of the sea glass, seed beads, and other glass after the resin is on)

Next, we'll add resin. We're goin...
Chubbie Dragonfly
We are working with an 8x8 canvas and creating a dragonfly with some acrylic paint and a piece of Chubbie glass from JL Glass. This little glass piece is the perfect thing to create a dragonfly's body! I'll also be using some seed beads to make those wings really sparkle.

Start by painting your background with Metallic White and then I'll also add the tiniest bit of Metallic Turquoise in an arch motion to create a pearly sky. Dry with a heat tool.

I have some small dragonfly stencils that I am going to use with some Enchanted Turquoise, which is an iridescent paint, to add two dragonflies in the background. I'll just place the stencil on my canvas and use a stencil brush in a pouncing motion to apply those. Dry with a heat tool.
Grab your tracer, tape it to your canvas, place graphite paper underneath, and trace just the wings onto your canvas with a stylus.
Next, I am going to paint the wings with Metallic Turquoise, Festive Green, Splendid Gold, and Metallic White, blendin...
Cotton Boll
We are creating a cute and simple Cotton Boll art piece on a small 6x6 canvas. I'm going to show you how to paint your background and cotton boll and then we'll add some Starfire glass, seed beads, and resin to finish off this art piece.
First, start by painting your background with a smokey blue color. I'm using Winter Blue and I'll also mix in some white paint too.

Grab your tracer, tape it to your canvas, place graphite paper underneath, and trace your cotton boll onto your canvas with a stylus.
Next, I'm going to paint my cotton boll with white paint. I'll paint the stem with Spanish Olive, which is light green. Then, I'll add some Olive Green, Raw Umber, and white paint for some shadows and highlights.
I'll add a second coat of white paint to my cotton boll and then add some Winter Blue to create some definition with the curve of the cotton boll.

Take a graphic pen to add some detail lines. I'm going to add some lines around my stem and also some short strokes around...
Teal Heart 💙
We are working with an 8x10 to create a simple teal heart art piece with clear glass, seed beads, and some gold leaf flakes. Plus, I am sharing a new technique with you that you can use for lots of future art projects - reverse stenciling!

First, we are going to paint the background of our canvas. I am using Aqua Sky and applying it to my canvas with a big, flat brush. Paint the edges of your canvas too. Dry with a heat tool.

I traced a heart onto a piece of cardstock. I'm going to cut out the heart with scissors and use that heart as my reverse stencil.
Add a little bit of double-sided tape to your heart and place it onto your canvas so that it stays in place. Next, I'm going to use Desert Turquoise, which is a darker teal, and apply it around my heart with a stencil brush, moving in a circular motion. I'll do the same with another teal called Mermaid Tail and white paint, blending the colors as I go out toward the edges.
Remove your stencil. I'm going to take my original te...
Popsicle Art ☀️
We are using a 5x7 canvas to create some cute popsicle art, complete with a real popsicle stick! I'll show you how to paint this from start to finish and we'll add on some glass seed beads and resin too. This is such a fun, easy summer project!
Grab your tracer, tape it to your canvas, place graphite paper underneath, and trace your popsicle onto your canvas with a stylus.
I'm going to paint around my sketched popsicle with some white paint and a tiny bit of Tropical Blue mixed in. I'll also paint the sides of my canvas too. Dry with a heat tool.

I decided to paint my popsicle a mix of red, yellow, and orange. I'm going to start with my yellow at the top, then orange, and then red - blending them together where they meet. Dry with a heat tool.

Let's work on details! Grab your tracer and trace on the little indentations of the popsicle. In the yellow area, I am going to take some orange on the corner of my brush and add it to the indentation to create a shadow. In the orange ...
Mini Watermelon Canvas 🍉
What screams summer more than watermelon? We are making a little watermelon art piece today. I'll show you how to paint it from start to finish using a fun palette knife technique. Then, we'll add some clear glass and resin to finish it all off! This one is quick, easy, and fun!

Grab your tracer, tape it to your canvas, place graphite paper underneath, and trace it with a stylus onto your canvas.
I'm going to take some black acrylic paint and apply it to my canvas background using a palette knife. My background isn't going to stay black, so this doesn't need to be perfect. We'll be adding another color on top later. Dry with a heat tool.

Next, we will paint our watermelon! I am using a smaller palette knife for this part of my art piece. I am going to start by applying some Primary Red to the right side of my watermelon and pulling it to the middle. Then, I'll add some Pink Melon in the middle, blending it towards the red. Then, we'll add white to the left side of the watermelon...
Let Freedom Ring 🇺🇸
We are using an 8x10 canvas to create a fun, rustic patriotic flag art piece! I'll be showing you how to get that rustic look using palette knives when applying our paint colors and also how to add some patriotic phrases. We'll also be adding glass and resin to finish the piece off. This is the perfect art project for the 4th of July holiday or anytime this summer!

First, start by sketching out the shape of a flag - the square in the top left corner and some stripes. I'm going to add a base coat of paint to my canvas using Prussian Blue, Cherry Red, and white paint. I'll also paint the sides of my canvas. This does not need to be perfect and doesn't need the best coverage because we'll be applying some paint on top of this. Dry with a heat tool.

Next, I am going to apply some paint to my white stripes. I am using red, blue, black, gold, and white and I'm applying this paint with a palette knife, and using the back of the palette knife to add the paint from right to left in natura...
Stenciled Hydrangea Glass Art Tutorial
This 8x10 art piece is super easy to create because we are using a stencil! I this hydrangea stencil and knew it would be amazing with some rose gold reflective glass. I'm showing you how to paint and stencil this art project and add all of the glass goodies! This is a great spring or summer art piece and is perfect for beginners too.

First, I am going to paint the background with black paint. I'm going to use a sponge brush to get more coverage faster. Dry with a heat tool.
Next, I am going to add some stenciled flowers in my background. I am using a bright pink called Exotic Bloom and applying it with a stencil brush. Dip your brush in the paint, offload the paint, and then apply it in a circular motion over your stencil very lightly. Dry with a heat tool.

Now, tape your stencil down with your flower in the middle to create your main hydrangea. I am going to layer up on my colors, starting with the Exotic Bloom and concentrating it in the middle. Then, I am going to add some D...
USA Glass Art 🇺🇸
We are using an 8x10 canvas to create a patriotic glass art piece! We'll be painting some red stripes on our canvas with gold stars, then we will add some blue bottle rings that I got on Etsy to spell the letters USA. I used my nippers to cut the bottle rings to make the different letter shapes. This turned out so cute and unique - perfect for the 4th of July holiday!

First, I am going to take a measuring tape and make marks down my canvas at the 1-inch mark. I'm going to start by painting every other stripe with white paint, taking it all the way to the sides of the canvas too. Dry with a heat tool.
Then, I'm going to paint the other stripes with Cherry Red. While the paint is still white, I'm going to take some white paint and go along each stripes line to blend that line a little bit. I'll also add a bit of white in each red stripes, and a bit of white in each red stripes. The messier the better! Dry with a heat tool.

We're going to jazz up our stripes! I have a DecoArt Meta...
Rose Trio 🌹
We are working with three tiny 4x4 canvases to make a trio of roses! I will show you how to paint these from start to finish, as well as add glass pieces for our rose petals. These would make great gifts or decor in your home for the spring and summer seasons. They are also super easy to create and are great for beginners just getting started.

First, paint the sides and front of each canvas with black acrylic paint. Let dry or dry with a heat tool.
Now, we will start painting our flowers! I am using dark pink, light pink, coral, and white paint. I am doing two pink roses and one coral rose. Start with the hot pink and make a circle - I like to make parenthesis with my brush to create that rose petal shape. Dry with a heat tool.

Do another coat of paint and then add in some light pink and some white paint, using the same parenthesis technique.

Next, paint the leaves for each flower. I am using light green, dark green, and white paint to give the leaves some highlights and sha...


